Quilting Supplies at Craftsy.com
03-07-2019

Curvy Clutch

Curvy Clutch

So…. I am not a big bag maker. I have made just a few, but am ready to dive in and up my bag making skills!

I recently went to QuiltCon and purchased this cute little kit on the right to make this zipper pouch.

The pattern is called the Curvy Clutch and is from Pink Door Fabrics. The kit came with every thing I needed except the interfacing.

You can find the free pattern HERE.

Get Up to 70% Off Clearance Items at shop.mybluprint.com 2/26-2/27/19, no coupon needed!

There is always a little learning curve to making bags…. so different from making quilts!

On this bag I accidentally cut my fabric in the wrong direction and didn’t have enough fabric left for my second piece. I had to come up with some quick thinking and made a seam down the middle of one side to make it work. There is usually always a way to get it done!

I just love the way this came out! It isn’t perfect but not too bad.

I can’t wait to keep trying some new patterns!

Leave a comment of your favorite bag pattern if you have one:)

myBluprint.com

Keep it Sassy♥

You can find and follow TheSassyQuilter  on Facebook, Pinterest, Bloglovin’, Instagram, Twitter or by email updates(form on right sidebar)!


Share Button
03-03-2019

Let’s talk about… Starch!

Let’s talk about Spray Starch!

So I brought up the topic of spray starch in last weeks Sassy tip post… let’s dive in and learn a little more about starch and how we as quilters use it.

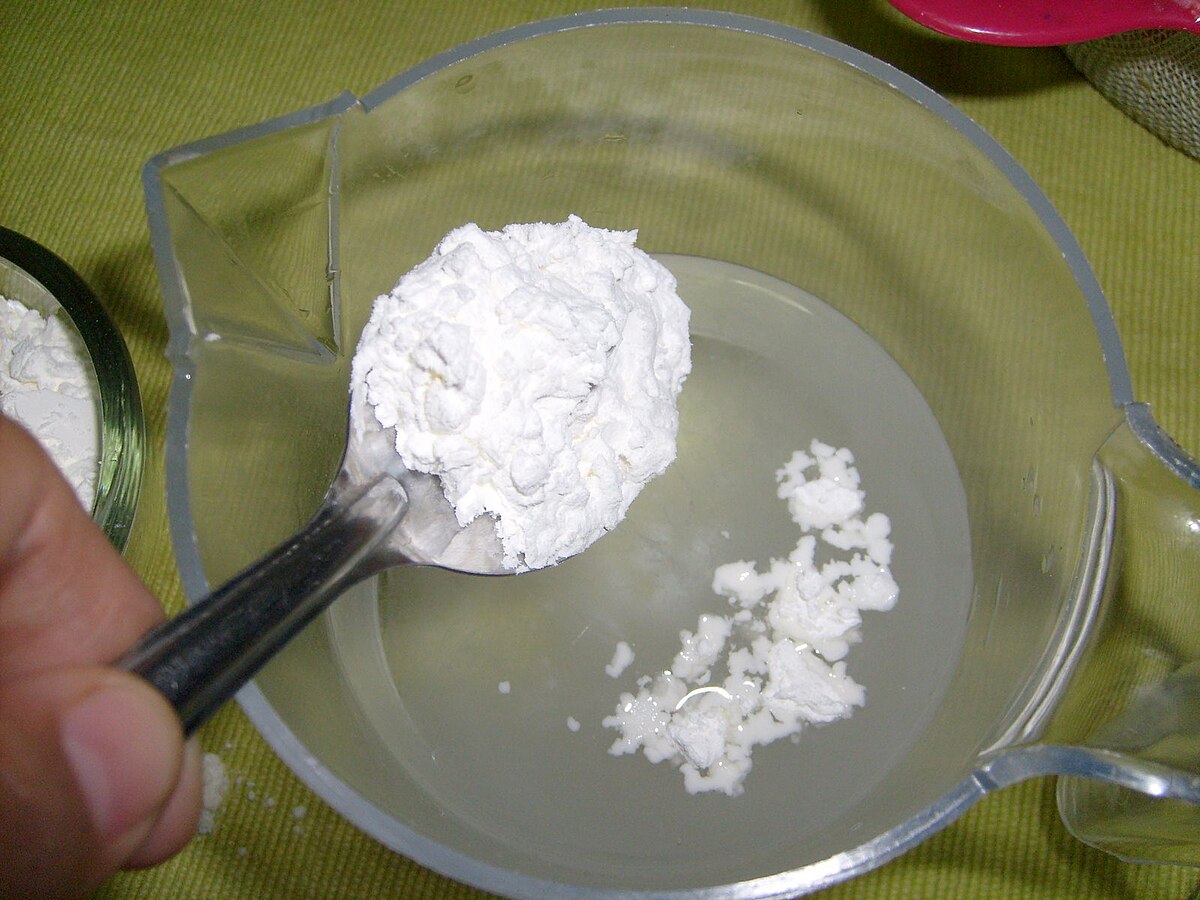
Starch” is a German word meaning strong or stiff. Where does if come from?  It comes from a variety of plants such as potatoes, wheat, rice and corn.

Image result for starch images

When combined with warm water it is used as a thickening, stiffening, and gluing agent. We use it in food, wallpaper, on our fabrics and all kinds of other things.

Image result for starch images

We enjoy starch for its stiffening qualities. It gives us our fresh looking collars and pleats in our clothes and in quilting it stiffens the fabric(helps with bias), keep fabrics clean(dirt sticks to starch and then washes off), helps to remove wrinkles, keeps seams flat and makes the fabric easier to handle or join with other types of fabric.

Let’s look at some of the most popular starching agents in Quilting…

Image result for what is spray starch made of Aerosol Spray Starch– most common type of spray starch. This sprays a fine mist which is easily distributed over your fabric. Be careful not to spray too heavily or you might get some white flaking. Letting starch dry before pressing with a dry iron also helps!

Image result for what is spray starch made of best press

Best Press Spray Starch– This starch is different because it is actually a starch alternative. It is made with a soil guard, wrinkle resister and shatterproof spray bottle. It also has a lighter weight to it and because of the spray bottle it does spray in mist/droplet spray. It comes in various scents and unscented. One of Best Press’s best features is that it is no flake and no clog , meaning it won’t leave any white residue on your dark fabrics!

Image result for what is spray starch made of flatter

Flatter is another Starch Alternative. They call themselves a Smoothing Spray. It has all the same qualities, but also boast that they are environment friendly and easy on sensitive skin. This is definitely the least stiff in my opinion, but still a nice spray and it comes in lots of great scents!

Get Up to 70% Off Clearance Items at shop.mybluprint.com 2/26-2/27/19, no coupon needed!


Spray starch is one of the many tools we have in quilting that makes our job just a little bit easier! So if you haven’t tried it yet… give it a go!

Image result for make your own spray starch

Wanna make your own? Its easy….Check out this link HERE.

myBluprint.com

Keep it Sassy♥

You can find and follow TheSassyQuilter  on Facebook, Pinterest, Bloglovin’, Instagram, Twitter or by email updates(form on right sidebar)!


Share Button
12-10-2018

10 FREE and EASY Handmade Christmas Ornament Tutorials

Don’t you just love Christmas!

I love decorating the tree and all the handmade Christmas ornaments are extra special to me. Giving handmade Christmas ornaments is always fun too….. but why do I wait to the last minute to make those handmade Christmas ornaments!!!! I know I’m not the only one so here are a few suggestions so you can get some super cute handmade Christmas ornaments knocked out ASAP!

Here are 10 FREE and EASY Handmade Christmas Ornament Tutorials!

The first few on my list(1-5) are by Mr. Domestic. I like his approach to these ornaments. There are many versions of some of these ornaments.

1. Woven Hexie

Image result for mister domestic ornament patterns

2. Quilted Balls

Image result for mister domestic ornament patterns

3. Scandanavian Folded Fabric Star

Image result for mister domestic ornament patterns

4. Fabric Swedish Star

Image result for mister domestic ornament patterns

5. Fabric Pinecone

Image result for mister domestic ornament patterns

6. Folded Christmas Tree

Christmas in July- Christmas Tree Ornament Tutorial from LifeAferLaundry.com

7. Fabric Styrafoam Ball

IMG_2935

8. Primitive Scrap Fabric Tree

Green and Brown Scrap Ribbon Christmas Tree Ornament

9. Scrappy Quilt As You Go Ornaments

scrappy ornaments | quilt as you go | patchwork posse | easy sewing projects and free quilt tutorials

10. Button Wreath

Happy Ornamenting!

Would love to see some pics if you make some of these:)


Keep it Sassy♥

You can find and follow TheSassyQuilter  on Facebook, Pinterest, Bloglovin’, Instagram, Twitter or by email updates(form on right sidebar)!

Share Button
10-16-2017

Quilty Vision Board

Do you have dreams of quilty goodness?

Visions of all the beautiful things you want to make?

Little mementos of quilty happiness?

Well its time for you to make yourself a Quilty Vision Board!

•••

You might also call this an inspiration board…. a collection of all the things that inspire you, excite you and bring a quilty smile to your face.

I have wanted to make one of these for myself forever!!! I was gonna use a cork board… but it was kinda blah. I had some more interesting supplies just laying around and think i came up with a much cuter version.

Supplies Needed:
  • Foam insulation board, however large you wish your Quilty Vision Board to be! If you get a large piece you can also make yourself a movable Design Wall(tutorial for that HERE) and then use the leftovers for this project. That’s what I did.

You can find all different kinds of foam insulation board at your local hardware store.

I bought this at Home Depot for $12. It measures 4′ x 8′ x 1/2″.

It measures about 1/2″ thick. Any similar product that you can stick a pin into will work.

  • Frame… If you want yours to have a frame. You can do this project without it.

I got this one at a thrift store and spray painted it black.

  • Painters tape, wider is better.

I used 2″ painters tape.

  • Stapler, even a mini will do!

Image result for mini stapler

  • Fabric, any kind will do…but a home decor weight fabric is nice.

Home Essentials Print Fabric 45"-Lovely Lattice Raspberry

Home Essentials Print Fabric 45″-Lovely Lattice Raspberry

I used this lovely print found in Joanns Home Decor dept.

Directions:

Measure the inside of your frame where your foam will set, then cut foam accordingly.

Cut your fabric so that you have an extra 5″ on all sides.  You need enough to fold to the backside.

Fold around all four sides and staple to the foam. Miter the corners to keep things looking smooth.

Use the painters tape to tape down the inner edges. This will keep it secure.

Make sure if your fabric is patterned that you keep things lined up straight when you are wrapping the fabric onto the foam board.

Set the foam into the back of the frame and secure in place with another round of painters tape.

Then flip over your masterpiece and hang in your sewing room!

I absolutely love mine!

My fabric matches my ironing board cover, so It really brings my sewing room together.

Now get to pining all your quilty inspiration! (I just used some cute sewing pins for mine)

I have some patterns up there, my fair ribbons, my quiltcon badges, cute quilty sayings… all kinds of fun stuff. I add to it all the time….can you tell I am short and can’t reach the top, lol!!!

Hope to see some of these you guys make, so please share!

Craftsy

Keep it Sassy♥

You can find and follow TheSassyQuilter  on Facebook, Pinterest, Bloglovin’, Instagram, Twitter or by email updates(form on right sidebar)!

Share Button
10-08-2014

ABC Adventure Blocks Tutorial

ABC Adventure Block Tutorial
ABC Adventure Blocks Tutorial

Todays tutorial is part of the Dream Big with Dr.Seuss Challenge with Fat Quarter Shop.

Fat Quarter Shop challenged a few bloggers to create something fabulous with the newest Dr.Seuss Fat Quarter Bundle by Robert Kaufman.

Dr.Suess FQ Bundle

This FQ Bundle also includes a super cute alphabet panel you can see in Fat Quarter Shop’s, “Big A, Little A Quilt”, FREE Pattern and YouTube Tutorial below!

So here is how to make these quick and easy ABC Adventure blocks!

ABC Adventure Blocks Tutorial

Cutting:

(26) 5″ squares of batting

(26) 6″ squares for backing your blocks

Trim each of your 26 letters from the panel with a 1/2″ border, about 6″ square.

ABC Adventure Block Tutorial

Layer each of the letters with a backing, batting and letter. Center the batting on the back of the letter block.

ABC Adventure Block Tutorial

On each block, stitch a zig zag stitch along the edge of the colored square surrounding your letter.

Then trim about 1/4″ around each square with some pinking shears to prevent the edges from fraying.

ABC Adventure Block Tutorial

Easy right!?! You could even quilt the centers of these blocks if you like.

Now how about that bag?

ABC Adventure Block Tutorial

From two of your remaining FQ’s, cut two pieces measuring 15″ x 17″.

Place them right sides together. Make sure if you are using the ones with words that you have them oriented correctly:)

Luckily I caught my mistake before I sewed it together!

ABC Adventure Block Tutorial

Sew a 1/2″ seam around three of your sides, leaving the top of your bag open.

You can use a zig zag stitch to serge the edges so your bag doesn’t fray on the inside.

ABC Adventure Block Tutorial

On one side of the opening of your bag…..

Un-sew about 3″ and fold those edges back, then stitch them down.

This creates a hemmed area where your drawstring comes out of your bag….sorry this pic is not the greatest, but these are hemmed individually and not connected…I can put my finger between those.

ABC Adventure Block Tutorial

Now…. we have to make our string for our drawstring bag!

Cut (2) 2.5″ strips from the long side of one FQ. Connect them together to create one long strip.

Press in half lengthwise.

ABC Adventure Block Tutorial

Press again so that the edges meet in the center.

ABC Adventure Block Tutorial

Fold in half again and use your zig zag stitch to close up your string.

ABC Adventure Block Tutorial

With your bag still inside out…

Double fold the opening and tuck your string into the fold.

ABC Adventure Block Tutorial

Stitch down this fold all the way around the opening of your bag…. being careful not to catch the string in your stitches!

ABC Adventure Block Tutorial

Tie the ends of your string together and give them a tug and your ABC Adventure Blocks are all set and now you have a perfect bag to keep them in:)

I hope you guys enjoy this tutorial and share it with a special little one.

P.S. This would make a great handmade Christmas gift!!!

Get your Dr. Seuss FQ Bundle HERE!

Enter to win a FREE Jelly Roll in this weeks Sassy Saturday Giveaway HERE!

Keep it Sassy

You can find and follow TheSassyQuilter  on Facebook, Pinterest, Bloglovin’, Instagram, Twitter or by email updates(form on right sidebar)!

Share Button
10-02-2014

Pumpkins Anyone?

Pumpkin Table Topper

Do we not love all things pumpkin this time of year???

Okay, well maybe not all of us!

Today I am re-sharing my tutorial for a quick and easy fall project! Just a few orange and green scraps and you can whip this up in no time:)

Click HERE for a step by step Pumpkin Table Topper Tutorial.

Pumpkin Table Topper

If you are looking to try something different…Craftsy is also running a special for this fun looking Halloween paper crafting Kit!

Jillibean Soup Halloween Kit

Jillibean Soup Halloween Kit +  Exclusive Free Video Lessons - None

Halloween is just around the corner. Get ready for spooky fun with one of Craftsy’s NEW paper crafting kits!

Work with your frightfully fun kit and learn how to create stylish Halloween decor projects with exclusive video lessons. Paper crafts expert Ronda Palazzari will show you how to use Jillibean Soup’s paper pads, black glitter beanboard alphas and festive embellishments to create a witch’s hat, pumpkin centerpieces and even a spooky banner!

********

Keep it Sassy

You can find and follow TheSassyQuilter  on Facebook, Pinterest, Bloglovin’, Instagram, Twitter or by email updates(form on right sidebar)!

Share Button
09-23-2014

Flannel Dog Bed Tutorial

Flannel Blog Tour

Dog Bed

Today is my stop on Riley Blake Designs Flannel Blog Tour and I have a super quick and easy Dog Bed Tutorial to share with you!

If you are like me and you have little pups around your sewing room, you know they love to lay on any quilty thing they can find! So when Riley Blake asked what I wanted to make for the Flannel Blog Tour I knew right away my pups would love to snuggle up on something flannel. So some cuddly doggy beds of their very own were in the works!

I used Riley Blake Designs “Oh Boy” by Lori Whitlock, 100% cotton flannel in Boy Swirls.

What you will need:

1/4 yd. Boy Swirls Aqua Flannel

1/4 yd. Boy Swirls Orange Flannel

1 yd. Boy Swirls Gray Flannel

1 standard size bed pillow( you can get the really cheap ones at Target, 2 for $7.)


Dog Bed

Cut 5 – 5.5″  Orange Flannel squares.

Cut 5 – 5.5″ Aqua Flannel squares.

Cut 10 – 5.5″ Gray Flannel squares.

Use the layout above to begin assembling your dog bed top.

Dog Bed

Piece your rows together, pressing each row in the alternating directions.

Dog Bed

Then join your rows together. Your seams should nest together helping you to keep things lined up!

Dog Bed

Cut 1 – 20.5″ x 25.5″ rectangle for the backing of your dog bed in the Gray Flannel.

Lay the backing and top right sides together an pin along all four sides. Sew a 1/4″ seam around the sides, leaving one side mostly open to insert the pillow later.

Dog Bed

On the side you leave open…..stitch just an inch or two past the corner and backstitch. This will keep the corner from trying to tear open while squeezing the pillow in.

Dog Bed

Insert your pillow. These inexpensive pillows are not so great for us people, but perfect for the dog bed. That way when they get a little funky you don’t feel bad tossing them!

Dog Bed

Fold the edges in and pin in place so you can stitch the opening closed. You can hand stitch this closed or use your machine. It is a bit of a squeeze getting this under the needle, but is pretty quick. Since it IS just a dog bed I wasn’t too worried if it got a little wonky, so I did it on my machine!

Dog Bed

Presto! Done……Hey, I’m thinking this makes pretty cool people pillows too:)

Dog Bed

Gus-Gus approved! …..I actually had to force my little pups to get on this thing, lol! Turns out yelling at them for even coming near most of my projects has made them a little fearful. Such a mean mommy I am:) Sorry pups. FYI… I have 2 pups, Gus-Gus and Little O, they are part dachshund and part jack russell terrier.

Don’t forget to enter this weeks Sassy Saturday Giveaway HERE!

(giveawayends Thurs. 9/25 midnight/EST)

If you want to know what other fun things you can do with flannel…

Make sure you check out all the other stops on the Flannel Tour!

September 5th through October 23rd
9/5 Julia @ Riley Blake Designs
9/9 Deonn @ Quiltscapes
9/12 Bonnie @ Fishsticks Designs
9/23 Paula @ The Sassy Quilter
9/26 Liz @ Simple Simon & Co.
9/30 Heidi @ Fabric Mutt
10/3 Carol @ Just Let Me Quilt
10/7 Amanda @ Jedi Craft Girl
10/10 Rose @ Rose and Odin
10/14 Samm @ Sew We Quilt
10/17 Marni @ Haberdashery Fun
10/21 Karin @ Leigh Laurel Studios
10/24 Lindsay @ The Cottage Mama
10/28 Sara @ Flannel Queen
10/31 Lucy @ Lucy Blaire

Keep it Sassy

You can find and follow TheSassyQuilter  on Facebook, Pinterest, Bloglovin’, Instagram, Twitter or by email updates(form on top right in sidebar)!

Share Button
06-12-2014

Sewing Machine Mat Tutorial

Sewing Machine Mat Tutorial

Today is my stop on Riley Blake Designs Quilted Cotton Blog Tour!

I have a quick and easy sewing project using their new

Double-Sided Quilted Cottons….which are just too fun!

Riley Blake Designs

Sewing Machine Mat Tutorial

I absolutely love my sewing machine mat and can’t imagine working without it! Mine was a handmade gift from my sister and really changed my sewing experience. Having all your tools right at your finger tips is great. No more knocking them off the table and trying to find where they landed:) I like my sewing table low and my knees just slide right under the pockets and I don’t even know they are there. Not to mention it adds some flare to your sewing studio!

Sewing Machine Mat Tutorial

Supplies

22″ x 24″ piece of RBD Double Sided Quilted Cotton- Medium Chevron/Dot in Aqua.

1 Fat Quarter of a coordination print/solid for Binding- Honeycomb Dot, Tone on Tone in Red.

sewing_machine_mat_binding

Directions

Cut your Fat Quarter lengthwise into six 2.5″ strips, then join on the diagonal to create one long strip of binding. HERE is a machine binding tutorial to help if you need it!

Using the binding you just made, bind the edges of your 22″ x 24″ piece of double-sided quilted cotton just like it was an entire quilt. HERE is a tutorial for binding a quilt.

Sewing Machine Mat Tutorial

Fold up the bottom edge of your mat approximately 5″(this doesn’t have to be really specific). Secure ends with pins to hold in place. Decide for yourself how you want your double sided prints to show. One side will be the top and the reverse will be the pockets.

Sewing Machine Mat Tutorial

Using a removable marking pen, mark lines where you want your pockets and how far apart you want them. You can adjust this to hold your special tools. I used a disappearing ink pen, but a water soluble or chalk marking tool are other good choices.

Sewing Machine Mat Tutorial

I like a few bigger pockets for my machine quilting gloves with three smaller slots for a pen, seam ripper or a specialty tool. You can’t go wrong here!

Sewing Machine Mat Tutorial

Using a matching thread, stitch along the outer edge just inside the binding. Start  just below the binding at the opening of the pocket and end at the fold where the bottom of the pocket will be. This will close the sides.

Sewing Machine Mat Tutorial

Now finish stitching all of the lines you marked to create your pockets.

Voila! That’s it…simple right?

For the more edgy quilter….I ventured out and made a sewing machine mat with skulls! Yes, I said skulls:) I know they don’t float everyone’s boat, but I thought it would be fun. I even added a little bow to give it some extra sassy-ness! The binding and bow are a Riley Blake Designs solid FQ in Hot Pink.

sewing_machine_mat_skulls

Don’t like skulls or chevrons>>>> click HERE to see all the fun prints they have to offer.

***I am going to giveaway both of these sewing machine mats!***

So if you are interested and want to enter, just leave a comment telling me which one you want…chevron or skulls.

Giveaway is open through the 18th. Open internationally.

In case you missed it, I also have a coupon code good for 20% off your purchase at Gotcha Covered Quilting!

COUPON CODE:

SASSY

Here is the schedule so you can follow along with all the quilty goodness:)

6/5 – Jedi Craft Girl

6/10 – Nancy Zieman

6/12 – The Sassy Quilter

6/17 – Just Let Me Quilt

6/19 – Simple Simon & Co.

6/24 – Haberdashery Fun

6/26 – Sew We Quilt

7/1 – Jina Barney Designz

7/3 – Leigh Laurel Studios

7/8 – Riley Blake Designs

Keep it Sassy

You can find and follow TheSassyQuilter  on Facebook, Pinterest, Bloglovin’, Instagram, Twitter or by email updates(form on right sidebar)!

Share Button
05-13-2014

Making Quilt Binding

Making Quilt Binding

Adventures in Quilt Binding…


Scrumptious Charm Quilt

When recently finishing my Scrumptious Charm quilt I tried a little something new with my quilt binding!

I love using my Robert Kaufman Quilting Calculator app on my phone to start my binding process. Just plug in your measurements and binding width and then it tells you how much yardage you need and how many strips to cut…genius!

Making Quilt Binding

 Now normally I cut my binding strips, usually 2.5″, and then join the strips on the diagonal(less bulk). I overlap them like this using pins to hold everything in place.

Making Quilt Binding

Then I stitch a diagonal line from corner to corner where they overlap. I like to overlap a bit so I know exactly where to stop and start my stitches.

Making Quilt Binding

This time I tried using a glue stick! Super quick and easy.

Making Quilt Binding

I just put a dab of glue in the upper right corner…you will trim this part off anyway.

Making Quilt Binding

With my needle in the down position I line it up in the corner where they overlap and stitch directly across to the opposite corner where the strips overlap. You can draw a line with a pencil or just eyeball it if your good:)

One of the awesome features on my machine, a Baby Lock Crescendo, is this laser line that shoots out straight ahead. It is great for short straight stitching and you can move it to the right or left!

Making Quilt Binding

Trim your 1/4″ seam.

Making Quilt Binding

Press open the seam to reduce bulk in your binding.

Making Quilt Binding

Trim off any corners if they are poking out.

Making Quilt Binding

Press your binding in half lengthwise….P.S. Why does my ironing board look twice as disgusting in this pic!

Making Quilt Binding

There you go! Beautiful binding that is quite Sassy:)

Keep it Sassy

You can find and follow TheSassyQuilter  on Facebook, Pinterest, Bloglovin’, Instagram, Twitter or by email updates(form on right sidebar)!
Share Button
05-06-2014

Sassy Summer Tote and Giveaway!

Fort Worth Fabric Studio

Today I am guest posting over at Fort Worth Fabric Studio’s blog.

I have a fun tutorial for a Sassy Summer Tote!

sassy_summer_tote

and Jodie is having a giveaway this week so you can have a chance to win the sassy Mango Margarita bundle I used to make this summer tote bag!

Mango Margarita

mango_margarita_fwfs

Click Here to Enter the Giveaway!

Fort Worth Fabric Studio

Click Here for the Sassy Summer Tote Tutorial!

So head on over and leave a comment to say hello!

Keep it Sassy

You can find and follow TheSassyQuilter  on Facebook, Pinterest, Bloglovin’, Instagram, Twitter or by email updates(form on right sidebar)!

Share Button